Wednesday, December 30, 2015

Bridal Bliss

As the resident seamstress of the family in Minnesota, I was asked to hem the wedding dress of my husbands second daughter, to be married in May. Looking at a photo sent in a text message, it was hard to say if it could be altered much but I would take a look. We finally got together at Christmas and she modeled her dress that needed to be let out in the bodice and hemmed 3.5 inches. Because the back was laced, there was a panel that was sewn in plus snaps so I could adjust it to give her another inch without showing the adjustment. But now for the hem: (sorry not much for photos to protect the groom from seeing this gorgeous dress)

It was made up of a satin base for the dress with layers of chiffon. Every other layer was pleated and all of the layers were on an angle, or asymmetrical. Since she needed so much off the bottom layer, a pleated one, I was afraid it would look like the last layer was just barely peaking out. But back to the beginning of this job, I was going to have to shorten the satin layer first, then the underlining, then the two layers of stiff netting before I worried about the chiffon. You might know it, the satin layer has a fine net stiffener all around so I needed to take out two rows of stitching and reapply that stiffener. Because there was a train, I didn't have to take out the entire hem, just the front and tapering back to the train. The underlining and layers of netting were pretty easy so that left only that chiffon, the part that would really show.

I decided I need to master the hemmer foot and now I had yards of chiffon that I just cut off to practice on. Enter the Singer 201 with a standard hemmer foot:

Singer 201 with hemmer foot
These were part of a set included in almost all straight stitch Singers of the day so I got out the instructions, watched videos, practiced, practiced, practiced, but here's what I got:
Hemmer foot in action (or in-action)
Note the fabric coming out the back of the needle? The stitches are there but it didn't catch the fold in the fabric. At least, sometimes it did and sometimes it didn't. This wasn't going to work.

Then I remembered how great the Bernina's stitched and they had a whole collection of hemmer feet so I got out the Bernina 830 Record with foot #168:
Bernina foot #168

From the top, those two models of hemmer feet hardly look different but when turned over there are differences. Look at the hem the Bernina made:

Bernina hemmer foot in action
Nearly perfect! I had a few stops and starts in the beginning but then I got into a rhythm and it really rolled along, pun intended. It was such a tight hem that I didn't feel the need to even press it and thought she might want to have the whole dress touched up right before the wedding anyway and could decide then if it needed any extra care.

Moral of the story: when faced with a high level task, go for the best equipment. Bernina is know for their marvelous quality of stitches and their feet might be expensive but for hemmers, they were the best. Did the hem look like it was a tiny ruffle at the bottom? Not at all, it looked perfect and she will be a perfect bride.


Friday, December 25, 2015

Small But Mighty

I've had a wonderful cabinet sitting in my kitchen. Of course it has a sewing machine in it and not just any sewing machine but a Singer 15-91 with the famous potted motor for gear to gear smoothness and strength. The machine is great with near perfect decals but the cabinet needed a bit of cleaning up and new upholstery on the seat:
Hollywood cabinet
Yesterday was the day to finally replace the red vinyl with new fabric and it was easy to do. I thought I'd share with you how it was done and didn't even require a sewing machine just hammer and nails. For starters, I needed to take the bottom of the seat cushion apart. It was a nice board with only four screws holding it on:
Base of seat cushion
Once it came off I saw there were tacks every two inches but I'm not going to put that many in, hoping the fabric I'm using isn't going to pull out as maybe the old vinyl would. The foam base in still in great condition so I'm leaving it as it is, covering it over with the new striped fabric.
Slab of original foam in excellent condition

I do use the old tacks that pull out straight so I don't have to hunt down the big staple gun.
Seat cushion before

All tacked down

The base board (second photo) gets screwed back on and now returned to the bench: it's a fit!
Seat cushion done and backrest is next (there's storage under the seat cushion)

Now I need to match up the stripes and take off the back rest on the bench but see how it's held on?
Bracket and screw holding the backrest in place
Only a bracket on each side with one screw; that doesn't seem like much but I'm forced to use their system since I have no better plan. Once back in place it now looks great:
Bench seat done and ready for sewing
I think it took me less than an hour and it really updates this marvelous sewing machine that does not go out of date. Here are some photos of this compact cabinet that is housing the Singer 15-91:
Singer 15-91 with nearly perfect decals

Here's my kitchen companion
This might be a small sized cabinet but it holds a mighty sewing machine, ready to tackle all kinds of sewing, from light to heavy. I think that's appropriate on Christmas Day when we think about God coming down to us in the form of man, a tiny humble baby born in meager circumstances. He might have started out that way but He is mighty to save. Now that's a celebration!

Thursday, December 24, 2015

Where Are the Bargains?

I am continually surprised at the bargains I run across on an almost daily basis. How do I find them? Where do I go? This is a post to let you in on all of my secrets. Well, maybe not all of them, but some of the thoughts and processes behind what I have been doing to get the low price (and not hurt anyone).
  1. Make the Rounds: I live in a well populated area with many resale shops so it's easy for me to catch quite a few on my way home. Sometimes the way home is a tad bit longer than usual but without going too far out of my way I can check many of them on a regular basis. This is especially important on the right days (customer appreciation, senior, members only, etc) as I can take 25-40% off on senior day depending on the store. One shop has 30% off every Friday so you can bet I check them out about once a month on a Friday.
  2. Check Online Auctions: I can't claim to be a fan of eBay but I do purchase parts on a fairly regular basis. When it says "make an offer" even though a price is listed, I will make an offer, especially if I'm buying in quantity such as bobbin tires, needles, sewing machine oil. Only a handful of my sewing machines have come from eBay, mainly because of the packing and shipping errors that can so easily occur. A few machines have come to me because I wanted them for parts and then I would not mind if a spool pin was knocked off or the front scratched. I do like Goodwill online auctions but I usually bid on those I can pick up locally. The S&H is always dicey unless they pack well and then it's too expensive. They are always "as is" so it might not be much of a bargain. My local Goodwill online auction pick-up is not too far way from home, I can arrange for a pick up on my way to work, and some items are "pick up only" so that eliminates those bidders who live in states where sewing machines are few and far between. They are not adverse to running the price up to get what they can't get locally. I picked up a serger once that came without a power cord and foot control but it was never mentioned in the ad so they gave me a percentage back due to the inaccuracy of the ad. I had the right foot control at home so it was not a problem to get it up and running. So far, so good with Goodwill online.
  3. Tell Your Friends: When I first got into repairing vintage sewing machines it was all I could talk about and my family and friends who certainly got an earful about my exploits (now you can read about them, too!). When they have come across sewing machines they think I might be interested in, I either get a call about how to rescue it or come-pick-it-up message. All of these notifications have turned out quite well with some classic sewing machines that were selling for a song or on the side of the road (thanks Dave, thanks Rose!). Due to the wonder of smart phones I can get a quick photo via text so I can say yea or nae (thanks Sue) and have saved them and myself from a few dogs.
  4. Get There First: This is referring to Craigslist for the most part. You need to respond quickly to the ad and be willing to show up sooner than later. Sometimes my call is only 20 minutes after the post and I'm too late but twice now I responded two hours after Featherweights were listed and I was still the first call. Do I spend all of my time on my computer? Of course not, but I do check in frequently and make my decision to contact the seller on the spot. 
  5. Be Diligent: This is something you need to keep on your back burner at all times because if you snooze you lose. One woman complained that she lost out on the Featherweight that I got after it was posted two hours because she was "taking a break." She probably made the right decision but then one did get away (I was also only ten minutes away from the seller, not an hour). Do I take breaks? Of course, but then I have to realize I will miss out and have to be okay with it.
All of the above tips are not just for sewing machines but include fabric and other supplies, too. It's a fine line between collecting, business, and hording. How much is enough? When I can look at sewing machines that are up for sale and say "No, I already have one (or two) of those" and walk away, I know I will be fine. When I can give up on a repair gone bad and use the machine for parts, I know I'm not as obsessed as I sometimes wonder. Bargains are good but only if you can use them. 

Now back to clearing off my work table so I can get some work done over my extended holiday vacation...

Monday, December 21, 2015

Crossed Wires

It was another big weekend, some things successful and others not so much. It started out when I got an email several weeks ago from Ginny who wanted the Singer 99 hand crank sewing machine but it had already been sold. She asked to be considered if I had another one. Well, this was her lucky day because I did have another one in the works so I put all of it together for a might fine looking Singer 99 hand crank in a bentwood case:

Singer 99 with hand crank
But there was a bit of a problem: could I wait until the 18th? Okay, that seemed reasonable but when the date came and she got in touch with me again I was neck deep in Christmas and had very little free time. Apparently, so did Ginny: we could not find a time to meet! We finally agreed on Saturday afternoon when she could meet us at a restaurant. I was texting her, waiting at the restaurant, still no Ginny or text and we were ready to head home. Sunday morning I find out she didn't get my text because she didn't even have her phone! Can she come mid-afternoon to pick it up at my house? Better hurry before my guests arrive and she did. What a nice conversation we had, she loved the hand crank and shared which machines she had predetermined she needed and then no more. Glad my hand crank was on her list.

The Kenmore 100, model 158-1960, had a questionable past but is such a good sewing machine that I have high hopes for it. It's an electronic model with a great selection of stitches but it needs accessories and the front storage box to really complete the package. No problem, Sears has great parts service so I order it. In the meantime I get a call from a faithful customer who thinks she has someone who would like to buy a sewing machine for her mom but is just going to go to Walmart. No, no, no! Go to Karen where she can get a much better deal and even guarantees it will run or you can bring it back she is told. When I get into the picture I think the Kenmore 158-1960 would be a great model with 100 stitches including the alphabet.
Kenmore 100
But wait, it doesn't have the storage compartment yet. We get it all arranged and I get through Friday night traffic to the Sears parts pick up only to find it's not the complete storage compartment, only the bottom of the box. Where's the lid? I get a text to say the girl is not going to buy used but is making a trip to Walmart for her mother's sewing machine. That's too bad but maybe my steady customer would like to see it for her DIL. We meet up at my house, take a look at the Kenmore but before she even gets there she asks her son if his wife would like a sewing machine. He had grave doubts so poor Kenmore 100 sits quietly waiting for its new storage box so someone else can buy her.

Dawn has come along for the ride and she has been interested in a Singer 201-2 for several months and now wants to see it in action. Only a week ago my husband and I put a new light into this baby and now she looks pretty wonderful. It wasn't just  attaching a new light but the socket had cracked but I was able to get a new fixture for a donor machine. Thank goodness it included the wiring because we ended up threading all of the new light and wiring into the machine several times until we got it right. The first time on a different machine is always a long process of learning the particular idiosyncrasies but once learned it is the accumulation of knowledge for other repairs. Dawn loved the 201 and we discussed when she would like to have it (after Christmas).

Singer 201 with new light

Saturday morning was a pick up of a sewing machine: another Singer 201-2. It was my delight to be the first person to answer an ad for this classic sewing machine in a bentwood case with key. We met in a mall parking lot so I couldn't try it out but still could see that it was in good enough condition. Although the wood on the case needs some cleaning and sprucing up, the machine moved fine and I trust all will be well. Upon closer inspection at home I find out the foot control doesn't touch the floor. What? The cord is so short the machine has to sit on the very edge of the table so I will need to put new wire on the foot control for it to be useful. Then I remember to check the power cord: the rubberized coating looks fine but when it is bent you can hear the wire cracking. Can it be that brittle? Yes, it can and is going to be replaced, too. Both ends of the cord are good so it will just need new wire and that's easy enough to do.
Singer 201 in need to new cords

Score card for the weekend: one Singer 99 hand crank sold and picked up, one Singer 201-2 promised for January 9 delivery, one Singer 201-2 bought and ready for easy wire project, and one Kenmore 100 waiting for its storage tray. Only three days to Christmas so there could be a few last minute sewing machine sales: who wouldn't want a classic Singer 201 for Christmas?

Tuesday, December 15, 2015

A Star Wars Christmas

Isn't it fun when our interests and skills cross paths with our vocation? That happens to me often enough that I must wonder if it's intentional on my part or just a blessing. To give our students a bit of stress relief during finals, we decided to have a Star Wars theme in the library and to kick off the release of their new movie. When we sat down to figure out what we wanted to do and what could actually get done, I volunteered to dress up our dress forms in appropriate costume and then the fun began. Which characters would be possible? What could I use that would be cheap? What was realistic?

It came down to Obi Wan Kenobi, Princess Leia, R2D2, and Yoda. We found out someone had a Chewbacca costume so we are borrowing that, too. As it turned out, R2D2 was the most time consuming but they all took a fair amount of time. Here's the break down:

Obi Wan Kenobi started with a donated karate outfit with added collar and belted with a find from Goodwill Outlet. Boots, also from Goodwill Outlet, were added at the base of the dress form with the pants tucked into them. The robe was made from one of my bed sheets that no longer had a mate, drawn from a pattern found online. All together he was pretty easy and could we worn by someone:


Obi Wan Kenobi

Princess Leia was the fun one to make with a long white gown made from a large polyester knit that was glowing white. I bought it not knowing how I would ever use it but it was just too good to pass up. Voila! An online tutorial provided all of the steps I needed to make the dress and belt.
Simple robe type of shape

The belt took several tired before I came up with white vinyl, silver lame, and covered buttons. The hair piece was from another tutorial and is waiting for a hairband. This costume is going to be worn by one of our staff on Study Day.
Princess Leia with Yoda
R2D2 took many ties and I finally just had to settle because I was running out of time. Several weeks prior I took a donated ball and marked off places for the many gizmos on his shell with duct tape.
R2D2 with tape next to Leia in my office
He then got a coat of primer and another of silver paint, waiting days between coats. The silver never dried and the tape came off and left the adhesive behind. What a sticky mess! So the ball came home with me for a paper mache treatment. It was not too smooth after the first coat so I tried using liquid starch as recommended of several websites. Oh no, this now created flakes every time it was touched. Then I added something that was more like Spackle and it got smoother but also heavier and had a tendency to roll away.
R2D2's legs on left with sanded head
 I finally just sanded it, primed, and painted with the silver spray paint and called it done. All of the little squares and circles on his head and body were then added, first in paint (did not cover well) and then in blue duct tape (that peeled the paint off). Appendages were added, knobs and lids hot glued on, and he was declared DONE:
R2D2
Yoda was the quickest of all with a donated Halloween costume coming to the rescue. A pillow provided the body, the costume dressed onto the pillow with an added face printed from an online photo of Yoda. He got stuck into a 5 quart ice cream bucket and went into the display. Here they all are on the day before Study Day, waiting for photo opps:
Library version of Star Wars characters
This should be fun on Study Day and we already had many comments about what we were doing so just wait until the characters go walking around the library! At least Princess Leia and Chewbacca will be and it's possible we might talk someone else into wearing Obi Wan Kenobi. Oh the fun you can have while on the job! Yes, sewing machines and sergers were used in this production and I did much of it at work or it was comp. time I have already used up but its a case of using what you've got to the delight of others. Now I have to finish up a few projects of my own at home!

Sunday, December 13, 2015

Ins and Outs

Yesterday I said goodbye to an old friend. That's right, I sold one of my first treadles that I never thought I'd let go but it was time to say goodbye.

Minnesota S treadle


I have loved this 3/4 sized treadle and its compact cabinet but I found I rarely used it and I'm not a fan of the vibrating shuttle type of sewing machine. Because it was in such good condition I thought it might sell easily but I got a phone call only 5 hours after posting plus she wanted the sewing box I just listed, too:

Sewing box opens up to 52 inches!
The buyer came over after work, at least an hour away, and just loved it. She was looking for a treadle with a cabinet that was in better shape than one she already bought and this one certainly was in good shape with no white rings on the top or chipped veneer. There is a bit of raised veneer on the top but I think glue in a syringe could fix that.

All closed up
Note in the first photo there isn't a leather belt but it sports one of the plastic tubes I have used on treadles and still prefer. They easily pop off and on, don't distort, and so far haven't gotten brittle.  She sat down and tried to coordinate the wheel movement with her feet and it was obvious she hadn't done this before and was a bit frustrated. It does take time but like riding a bike, once you learn you don't forget it. Here's the compact insides of this treadle:
Head down with treadle mechanism intact
Everything is contained inside the box so it seems to keep clean and those exposed treadles can be a nuisance to dust! The sewing box was sold because I found another one that was in better shape so I transferred my stuff into it and decked the old one with a set of sewing supplies so it could make a nice gift. So it was bye-bye to the Minnesota S and a full sewing box all very quickly. Hey, it even fit into the back seat of her car! I think she will find herself practicing that treadle movement and get it right very soon.

So what took its place? Nothing. We just moved the sofa back into place and enjoyed more space in the living room.

Okay, that's not quite truthful. I wanted another machine in a cabinet and when my husband said where-are-you-going-to-put-it I confessed I was ready to sell the Minnesota. Now in front of the cabinet in the living room I'm back to three cabinets in front of it as they welcome a Singer 115:
Singer 115 dated 1921, year of my father's birth
For her age she is in very good shape, has a motor with some wiring that only needs to be freshened up, and a table that only needs a bit of sanding and maybe linseed oil. Here's a close-up of the center decal:
Singer 115 Tiffany decals
This sewing machine typically had Tiffany decals, as this one does, along with a large spoked handwheel but mine is electric so it has the solid handwheel. Note the small dial for stitch length: there's a lot of guess work going on there (plus no backstitch)! All in all, she's a beauty even if she came without a slide plate over the bobbin and is missing the spool holder. Those items are easily found (note I already tacked on the slide plate), and she came with her original manual and two bobbins! Am I going to keep her? Probably not but I think being able to move the sewing machines out that I no longer use is a good sign. Does this indicate I'm really not a horder? I hope so but don't go into my the basement. There are stories down there.

Tuesday, December 8, 2015

Crafteroon

It's fun to share our talents with others, sometimes learning a new skill or taking the time for someone else. My husband and I spent a Sunday afternoon learning a new craft, a crafteroon, when my daughter Kelly opened her home to those who wanted to make jewelry. There is no charge for the event and she even has supplies for all you would need. How does she do that? No charge? But then you get to her house and see all of the beads, pendants, metal works, and findings she has and you get the picture: she would love to have some of it gone and if it leaves via someone else's efforts, that's just great. My husband insisted on buying two small packages of silver hearts to make each of his daughters a pair of earrings and some of the older granddaughters necklaces but I assured him Kelly probably already had a stockpile of hearts. I brought along a couple dresses that I was trying to find jewelry for and we managed to match up some of the beads and a pendant stone.

We arrived to find two tables in the dining room that had boxes of jewelry findings down the center. They are in compartmentalized boxes by the type of metal: shiny silver, silver, antique silver, gold antique gold, bronze,black, etc. On a side table were beads by colors. Into the living room were more boxes of beads by color on the coffee table and even more on a low set of bookshelves. It was overwhelming!

Liz was already there and a friend of hers from work came a bit later but even though we each had ideas of what we wanted to make it was still a lot to take in. With Kelly's direction, things took shape as we found pendants and other pieces, starting to put form to those ideas. Ready for style and color consultation, Kelly gets you started and gives assistance in the techniques for putting things together.
Here's the layout in the dining room: see more on the table in the background?
Do I know how to tie a clasp into a necklace? No, but Kelly does and shows you on one end and then helps you try it other end with her guidance. Along the way there is much conversation between all of us as we admire and give judgement calls on what looks nice together. Hot beverages were DIY but we were almost too busy to stop and take a sip. There was going to be a prize for anyone who used up a whole container of beads, thus freeing up some space but when I knocked a container of tiny beads onto the floor (losing about a third of my already strung necklace beads in the process) I was declared the winner even though it wasn't exactly what she was aiming for. I think we could come over every week for a year and hardly make a dent into her supplies. Why so much? She was the recipient of someones jewelry making supplies when they could no longer do this and it almost doubled her count. We are grateful she shares this mountain of wealth with us.

Here's what some of us made in the two to three hours we were there:
Liz's earring up in the corner but her friend made the rest: WOW!
Earrings are for Jim's 4 daughters and necklaces for granddaughters: I think they have HIS heart.
My contribution with purple necklace, earrings in another shade of purple/blue
I picked up the sewing machine charms at the last craft fair and Kelly had the right charms to add to them. Since this is a sewing machine blog, this is my tie-in:
It was a productive and fun afternoon in December that gave us all a good time. Sorry we couldn't lighten Kelly's load by much but I understand she's going to have another one soon. Wouldn't you like to come?

Wednesday, December 2, 2015

The Holidays

"Tis the season to be ...buying a vintage sewing machine? The time between Thanksgiving and New Years has been a good time to sell sewing machines, at least that's my experience. It's possible we are all looking for ways to keep busy during the cold months in Minnesota or maybe learn a new skill in the new year. Here's the activity at my house in the past week:

The very lovely Singer 15-90 was called into duty as Bobbi wanted to finish the quilts she started for her two sons. Previously she was hand-stitching them, partly due to the curves in the pattern but now she knew if she was to get the quilts done she would need a sewing machine. Not only is this a classic and a good strong sewing machine, it was in excellent shape with a refinished Queen Anne #40 cabinet. This was the same one I rescued after I got a phone call from a friend who spotted it at a neighborhood garage sale. I'm very please it is now going to a good home. As her son carried it out to the car she confided it was her Christmas present. Merry Christmas, Bobbi!
Singer 15-90 as a Christmas present

Next up and out the door was the Kenmore 32, a wonderful lavender model that was finally going to Larry. I say finally because Larry had been in touch with me over the past several weeks but only wanted to come during the day and we kept missing each other. As I relisted the ad he called again and we managed to make it happen. Whew! The lavender lady was finally going to someone who has wanted it for some time. What is Larry sewing? Upholstery was the project that needed this all-metal sewing machine, complete with cams and accessories in a restored table.  Thanks, Larry!
Kenmore 158-321 in lavender
Now we have a Singer 99 in a bentwood case with a hand-crank that caught the eye of a quilter. Suzanne came with her husband and she tried it out already knowing it would work nicely when they go up to the cabin where there is no electricity. We discovered I did not have the bobbin winder repositioned for the hand-crank but she also didn't have enough cash on hand since they came from antique shopping. It was agreed upon that I would fix the bobbin winder and she would have her husband come over and pick it up the next day while she was at a quilting session with friends. He came the following day and told me he was told he was not to bring it home but needed to bring it to her quilting friends so they could see this new wonder. Sometimes what is old is new again, Suzanne!
Singer 99 with a hand crank attached in bentwood case
And finally, through a snow storm, a whole family came to try out the Elna Lock Pro 5DC serger. They called after work to see if I was still willing to show them the serger and I reminded them of the road conditions but they really, really wanted to come now.  This was a fully loaded model  with ten different stitches but electronic so it displays the settings for each stitch making the manual almost unnecessary.
Elna serger with display
 It was the first serger I bought and now I see it was just more than I could handle and I really didn't bond with it so I hoped this was the right serger for the right person. Fortunately, this was not her first serger but after having an unfortunate experience with one from Walmart she was looking for a better machine. This is a very nice machine so we ran through rolled hem, 3-thread overlock, and 4-thread overlock. Needles were taken out and added back in, adjustments made, and the foolproof test of taking all tension adjustments down to zero and back up one at a time. Although it's a bit of a tedious process, it will show you how to adjust tension nearly perfectly every time. Even though the screen will tell you where to set the tension, different fabrics and layers can give varying results. Taking each adjustment through the tension numbers, zero to nine, you can find where it stitches best and then repeating for each thread. If you start with the upper looper to find the best tension, go to the lower looper, then proceed to the needles, in the end each one will be set on optimal tension number for the best stitch. It really works! When I first learned this in a seminar I thought it seemed like a lot of work but I've since used the process in a bit less formal way and have found it easy and only takes as long as it takes to serger four strips of fabric. In the end, she felt like she could do this on her own and I thought she had a good understanding of the process. Yea, another serger found a good home!
Elna Lock Pro5DC

Four sewing machines in four days was a bit of a whirlwind, especially since the serger had only been posted for a day before it was sold, but the two cabinets that left my living room gave us much to be thankful for. With only four or five cabinets left we could rejoice except for the new cabinet that joined us, but that was another post for another day.

Tuesday, December 1, 2015

Don't Mention It

We had our first snow this season and you would think we would know the routine by now but it seems to have caught us off guard. I could go into work late when the roads were clear but that didn't help much when it started snowing again during the drive home. Imagine my relief when I could arrange to stay home the next day (but only because I was working Saturday) and get back to some long awaited tasks. With a whole day before me I made a mental list of enough jobs to last two months so I prioritized. With Christmas ahead I needed to decorate the house and write the annual Christmas letter so what did I actually do?

I made panties:


There was a great half price sale at Serger Peppers for Black Friday so I bought a pattern for girls panties, ages 3-14. Since I was going to see my granddaughter on Saturday I made up two pairs in dots and flowers but I gave them away before I could take any pictures. Come to find out, they were a big hit, with one pair getting worn two days in a row. Oh oh, Grandma better get sewing!

You do not need to use a serger but should consider using a stretch stitch, which I did on the first pairs, using a Viking #1+, but then I gained in confidence and made the rest on a serger, the Huskylock 1001L. The pattern suggests making them in batches and that did help since I didn't want to keep changing thread colors. I took some photos this time just to show you how easy it was to make a tiny pair of panties:

All lined up and ready for the waist and leg bands
I pulled out all of my knits and looked everything over, deciding on the above color combinations. The only restriction is to have the bands in something with at least 30% stretch. I quickly cut out and sewed the body of each one together as you see above. The directions were fantastic, making it easier, because there are parts that could be confusing for a beginner. She recommends using cotton knit for the crotch piece from an old t-shirt or underwear, something that was made to be worn next to the skin in such a delicate area. An old pair of Grandpa's briefs were volunteered and cut into many little hour glass shapes for the inside of the crotch.  Here's how the bands were applied, using no elastic:

Band and body of panties were marked in quarters
After each band was sewn into a tube shape, it was folded and divided into fourths. So were the panties body so then you simply match up the pins so the fabric of the smaller band is evenly distributed across the larger body.
Pinned and ready to sew on the waistband
Now for the serger:
Note pin placement so it can be easily removed (I'm a lefty)
This is not a free arm serger but it worked quite nicely and looks very professional when finished:
Waistband done and only the leg bands left!
The same is done with each leg, dividing the portions into fourths and pinning:
Be careful not to make this seam any larger than necessary (or a very narrow crotch is the result)
When both legs are done you have a finished pair of panties:
Ta da! Size 3 years finished!
I loved the swimwear type of fabric and the serger made it easier to sew with very good results. Note the blue pair with red trim: they look like acid washed denim and the inside of the fabric is a bit fleecy for warm buns. I think that pair might be her favorite but we shall see.

Did I get any of the Christmas work done? Nope! But I did have a very fun day with various sewing machines and sergers. I also worked on a lovely purple dress that I hope to share photos with you later, but it's not done just yet but it turning our really, really nice. Now I will just need to find some place special to wear this dress but with Christmas parties ahead, I better hurry and get it done. The cards and decorating had to wait one more day (or week?) but I'm returning to work a very happy seamstress. That counts for something, right?

Friday, November 27, 2015

Discouragement and Encouragement

The last craft fair came and went without any good news: it was a bust for us, barely covering expenses. We have analysed it and think it's possible this is too big of a venue and my kitchenie type of craft does not appeal to the younger women that come to this particular show. Between the two craft shows I worked like crazy making up 25 new hot mitts, five more aprons, two new tea cozies, and fixing the display hardware and soft ware (pressing the tablecloths to be exact).

There was interest in the men's shirt aprons where I added vintage linen and most of them sold:
Corner of a vintage tablecloth
Center circle of vintage tablecloth (lace added)


Nice to have a good idea for the linen and great comments from the women who looked so I'll continue to use the vintage linen with other ideas I have. On the bright side, my mom wants four of the hot mitt sets with towels so I consider that goes with the craft show sale and makes it a bit better. Thanks, Mom!

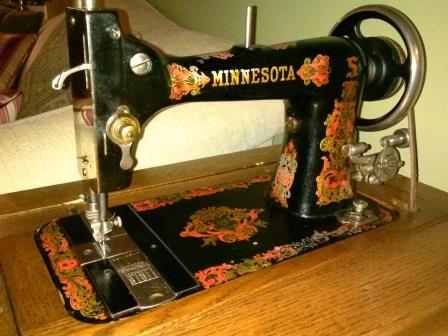
Just when we think life is treating us cruel we are in for a surprise. After picking up a turkey in preparation for Thanksgiving, I stopped at a local thrift store to see if I could pick up a kitchen tool I like to sell with my hot mitt sets.There was a sign on the door announcing their furniture with orange tags were half price today so that peaked my interest, too. I just got to the back by the furniture when I spied a desk with a split top, a sure sign there is or was a sewing machine inside. It was a very nice desk, a newer solid wood style in light oak with a price tag that was a little high for this particular store. I open the top up and see the back side of...a Viking sewing machine. Not just any Viking, but as I pull it up into place I see it's a Viking Husqvarna 1070, very similar to my beloved Viking 1100.
Cabinet fit for a Viking!
Storage, storage, storage!
 I'm pretty excited by now and as I open the doors and drawers that are loaded with supplies, I see the foot control. After asking if I could move it over to an outlet and scooting it over seven feet, I get it plugged in and see that everything lights up but the needle is broken off and the bobbin has a ton of thread wrapped around the finger. That was the cause of the jamming and broken needle so I think I can fix that pretty easily. With shaking hands I get it up to the check out where I only have to pay half the amount on the tag. YES! I have to drive around to the back for loading (so much for dragging it up to the front) and talk the young men into letting me use my screw driver to take out the two screws that bolt the machine into the top leaf. I also insist on removing the drawers so the contents don't end up all over the back of my car but they are good sports and go along with my requests before loading it in the car for me.

Once I get it home with the turkey I have to tell my husband that I bought another cabinet model. After I exclaim about the great turkey we are going to have in a few days I tell the story about the half price Viking I found. He's not mad or even unhappy but I know he feels his space is shrinking. It is. Dinner is made and eaten and I have to fly out the door to babysit but the anticipation of coming home to find out if I made a big mistake with this purchase looms.

Viking Husqvarna 1070 sewing machine
I end up using a razor blade to remove the knot of threads but then the bobbin really rattles so the whole casing and hook needs to be removed and the area under the needleplate is also in need of a cleaning. It's full of packed lint but nothing terrible or alarming so I get everything clean and reassembled. Without the bobbin case it sounds very smooth so I run it again with the bobbin and case to find it seems a little loose. When all threaded and trying out a variety of stitches, I need to adjust the presser foot pressure but everything else works great. Unlike the Viking 1100, there are no stitch cassettes to remove and lose: everything is built in and seems to work perfectly. It came with only one additional foot and is missing the extension table, but has the original manual and another printed set of papers where you can see the owner took a learn-to-use-your-Viking sewing machine class. I'm in heaven!
Built-in stitches with the push of a button
The next evening I get another Viking in the mail, an Ebay bid I won for a Viking #1+. I get it for a ridiculous price because there is no foot control. I see it uses the same one as my 1100 so at least I can try it out before investing in one for this machine alone that is over $100. It does come with the extension table that is full of additional feet and bobbins, maybe ones that can be used with the new-to-me Viking 1070.
Viking 1250 a.k.a. #1+

Extension table with front and back storage for feet, accessories, bobbins
Although this one had stitch cassette A, it looks pretty beat up yet it works:

Viking 1250 with stitch cassette A
I think this might be one from the earlier 1100 series because the Viking #1+ has cassettes that are fairly bright blue. With only one cassette, I need to look for the rest and find L is available for only $20 so it's now coming in the mail this week. The manual, a free download from the Viking website, shows only cassettes A, B, D, and L were to come with the machine and now I have two of the four.

Each machine has parts missing but I'm not ready to put them together to make one machine: both are just too good to use for parts! I'm excited to try them both to see what they can do and hope this long weekend gives me some time for sewing. Already two calls have come in for sewing machine appointments (cabinet models!) so let's hope there will be more space available for that great cabinet/table of the Viking 1070, now waiting in the garage.
Nice sewing space, huh? Get me out of the garage!
 For all of the above I'm grateful. I have a roof over my head that I share with a generous man, good health, a great job, and a wonderful hobby that I get to share with you, my readers.

Thank you, dear readers of this blog about sewing machines and my adventures with them!