Showing posts with label sewing machines. Show all posts

Wednesday, May 24, 2017

32 and Counting

What is it about presser feet that makes us want more? Maybe we like to collect things that "should" have come with our sewing machine. Maybe we like the sense of accomplishment in learning a new skill in using the specialized feet to make a job easier. Or maybe we just like a whole box of shiny things. Here's a new box of 32 snap-on presser feet that I've been working with:
32 snap on presser foot set
I really like the box they came in with the foam cutouts to hold them when not in use. But there was a flaw in how they put this all together: the sheet with the labels, all of the identification info, is on the outside of the box where it shows what is inside but once you open the top...which one is which? So, clever me, I made a scan of the page, shrunk it to fit inside the cover so when you open the lid you can identify the name of each foot:
Box cover

Inside of box lid: see the "before" in the first photo
Some names are really helpful, such as blind hem foot: it makes a blind hem. Straight stitch foot is for making straight stitches. But what is a cording foot for? How about a double welting foot? I figured I could work through these babies over the coming months until I went back to the quilt group in September where I've been asked to talk about presser feet and what you can do with the specialized ones. But then I took this set to work to show a friend and somehow I ended up buying another set for the sewing machine in our new "maker space." This set was just a bit different with a molded plastic insert, not the foam in my set. I knew this was going to take some work to get this tool ready for use my those who are less familiar with sewing machines so here's what I did:
Presser foot set with individual labels
Each foot got a label nearest to its spot in the set and a tiny photo of each piece underneath so you can match them up. At least it's an effort to keep things organized but how are they going to know how to use them? I proceeded to watch video clips in how to use each and every foot in this set, putting them in a chart. Not all of the names matched up, such as the lace insertion foot is also known as the picot foot.

Now you are probably asking how you can get your hands on this chart, too, so here's what I can do for you. Here is a link to this chart that you can view and download yourself:

Presser Foot Chart for 32 low shank snap on feet set.

Let me know if this doesn't open for you but I think I've set up the permissions correctly. If the links to the videos become extinct, let me know about that, too, so I can find a new one. I tried to find clips that were the most helpful with the least amount of advertising but I'm sure there are better ones if you only keep looking. Or maybe this will inspire you to make your own chart on how to use the feet on your sewing machine. Oh, the places you'll go, according to a popular Dr. Seuss book. Who knows...


Saturday, April 23, 2016

Wrapping Up

It has been a wonderful experience to take this class from Ray White who teaching sewing machine repair no matter what the brand. His principles apply to almost all machines, even industrial and sergers, so I think I'm going to have to take this information home and apply it to the collection of to-be-repaired machines that I own already.

We finished up this morning with check springs, escapement, and setting tensions back to factory settings. Does that sound intimidating? It is! But now I know the vocabulary and how to go about fixing those things. We spent the afternoon saying goodbye to classmates as they took off for Texas and Florida and working on our own machines. We looked at a Singer Featherweight and found out how to take out wound up thread under the bobbin, a Janome that was sold with "multiple problems" that turned out to be only a needlebar that was too low, and then a lesson on sergers. Melinda and I packed up and hauled my six machines out to her car as she left her's behind since she is going to continue on Monday with the advanced class and we chatted with Ray about teaching and Elnas. He showed us some of his treasures and we both realized we could not breathe that rarefied air of owning a restored Elna by such an expert but they do exist!

Dinner was late, as always, but it was worth waiting for as we went to the grounds of the Arcadia Academy to have dinner in their Thee Abbey Kitchen Restaurant.
Arcadia Academy gymnasium
The grounds were originally Arcadia College before the Civil War, but spent most of its years as Ursuline Academy and is now being renovated as as restaurant, bakery, bed & breakfast, and local weddings. They have a ways to go but we sure enjoyed our meal, homemade ice cream for dessert, and even the local talent for live country music while we dined.
Arcadia Academy Chapel
 It will be a long ride home tomorrow but so well worth it. This is a little slice of Americana that we were glad to be a part of when we could get away, spend the time to learn and still enjoy the countryside. I'll have more later about visiting the little shops and some of our special finds but I gotta leave you with something to look forward to, right?

Friday, April 22, 2016

School Days

It's always fun to be doing an activity you love and this time of sewing machine repair school is just that: FUN! Ray White is a serious guy but he can still make our class enjoyable as he weaves stories into the facts to help make it stick in our memories. We started out our first day with a bit of show and tell of all the tools of the trade and items we might consider for purchase, some from Ray and some through various distributors. I'm in class with six men and one other woman, Melinda, and half of the men are actually working on industrial sewing machines when they head home. The men add information about tools and where you can get a good deal on a vibrating tumbler (Harbor Freight) but most of us are on equal playing ground.

As we go through the various parts of a sewing machine and how things should be and how to make adjustments, each of us is sitting in front of a sewing machine we brought or one Ray provides (yup, the industrial students don't have personal sewing machines) and we apply this knowledge to ours. Ray then comes around and points out how an adjustment can be made on each of them since we all have slightly different models. Here's Ray looking at my Kenmore 158-13160 and the feed dog timing:

Points for adjusting the feed dog timing

Ray shows other adjustments on my machine
Looking on as Joe has his borrowed Elna Lotus analyzed
As if this wasn't enough, we have our lunch catered by a restaurant that is right in front of the motel where many of us are staying and so far we have had pulled pork sandwiches and fried catfish sandwiches. Hot coffee and iced tea are always ready and bottled water with breaks in the mornings and afternoons to give us time to stretch our legs. But you have to see where we get to sit all day:
Front of the room where Ray is at his desk

Wall behind me, full of Elna sewing machines
Can you believe it? It's all I can do to keep my eyes on Ray and not look longingly at the sewing machines behind him. But in an effort to keep things lively, Ray has a giant needle, maybe 20" long, that he got from Schmetz, the German needle company that he uses to demonstrate how the needle and thread actually make stitches. He also has a nifty board to illustrate how hook timing works:
Is that hook just a little shy of the needle?
 Tonight before two of the men left for a tee time (it's about 75 degrees here today) Ray said we were moving along at such a good pace that tomorrow we will be done well before noon so we have the rest of the day to work on our own project machines so we can troubleshoot using his help to repair. Hot diggity dog: this is why I came! His expertise is great and we are still having fun. As Melinda and I were riding back together she said "I think we have a really good class" and I would have to agree.

Tuesday, April 12, 2016

Classroom Fun

I have been trying to get a how-to-use-your-vintage-sewing-machine class up and running and it actually happened last week. There were the four women signed up and they all came excited to learn to use their sewing machines but were somewhat afraid about how to start. As it turns out, they did not just happen upon the local community education site but I had recent contact with these women and mentioned they might like to take a class I had running in April. Karen and I first met when I bought a large lot of jewelry making supplies from her and she mentioned she would now like to turn her attention to sewing. SEWING! My eyes must have lit up as I asked her if she had a sewing machine (yes, a newer Singer) but she didn't really know how to use it. Because we had each others contact information, I went home and sent her the access to the information and she registered with Diane.

My contact with Deborah was a bit unusual as she wanted to know about buying a sewing machine for her neighbor who ended up not getting one. That opened the door for me to talk to her about her absolutely lovely Kenmore sewing machine that was still new-to-her. She wasn't too sure about all of its functions so I suggested my upcoming class. Deborah signed up and even brought her teenage daughter, Skye, who had her own Kenmore, another good vintage model.

So there we were: 2 ladies with their much newer Singer sewing machines at one long table and 2 at another table with their vintage Kenmores. I had two sewing machines as demos, a Kenmore 158-1040 and a Bernina 807 Minimatic. The principles are the same for sewing but the know-your-sewing-machine part was wildly different. We talked about the basics and what our machines might be able to do since they all had zigzag, stretch, and buttonhole capability. We sewed on striped fabric to see if we could sew straight lines and then jumped into making our own pillowcase. I brought pre-cut fabric and they brought their own, too, so they used a bit of both. Our teenager, Skye, just wanted to know how to get it done but the other women were interested in making a concealed, or French,  seam knowing this was going to be a mess in the laundry unless it was bound in some way. I practiced on a pillowcase sample with the short end first and then the first step on the long seam:
Step 1: Sew seam with wrong sides together
Step 2: Turn outside in, seam same distance away to encase raw edge

Step 3: On outside you cannot see any stitches

Karen and Diane found out they needed to sew farther away from the first seam or trim the seam before sewing the second time but it was a learning process and they were very proud of the end results. I encouraged them to not just hem the final edge but to go back and add decorative stitches, using all they had on their respective sewing machines. This would be a good practice run and on a practical use item to give it a bit of flare.Here's my sample pillowcase (purchased pillowcase where I used my Kenmore 158-1803 and Viking 1100 to make the stitches).
Decorative stitches on deep hem, lace trimmed

I added the lace on the edge to give them a few ideas of how they might trim theirs. By this time we were packing up and hauling everything out to the cars. I had a stack of books and miscellaneous items for give-aways: how-to-sew books, thread caddy's, and brushes to clean the inside of their machine. At the end of the night I went home exhausted but happy with my four students who each made a nice pillowcase, learned some things about their own sewing machines, and were going to be ready to start another project. Maybe they will make another pillowcase? I did hear something about all those repairs that were stacked up at home so maybe even getting that pile down a bit would be a start in the right direction. I do know that Deborah was very happy to have her daughter sewing on her own machine and feeling more successful. Sometimes all it takes is someone other than mom to say things are going well, here's how you can do this, for it to suddenly make more sense.

Would I offer this class again? You betcha! As they were walking out I mentioned it had been offered as a 2 session class but it was pared down to one for tonight. Karen stopped and looked over at Diane so maybe I should try to offer the two session class again. There's nothing like showing up ready with all you need and an evening to get a project at least started if not nearly done. What could we do next time? There are always pajama pants or a simple t-shirt but I'm going to have to work that out for maximum learning and success. Yes, it was a good start on learning to sew with the sewing machine you have. This reminds me of the song from the '70's "Love the One You're With." Learn to love the sewing machine you have and you might be surprised how much fun it can be.

Tuesday, January 5, 2016

Yes, we are Still Stitching

As promised, I watched the film Still Stitching, produced by James and Brenda Wolfensberger of New Savvy Productions and think it's worth the price in time and money to watch. At first, I thought a film only fifteen minutes shy of two hours was going to be just too much, especially since I watch so few movies or even television (how do you think I get so much done?) but they captured my attention right from the start. If you enjoy looking at and talking about vintage sewing machines, this is one of the few current films that will satisfy your longing. Maybe it will stir your interest in further collecting, too, so this could be an enabler device!

Following a chronological timeline of the first lock stitch sewing machine in 1844 to the late 1960's when plastic took over metal components, we get to see those first machines and detailed explanations of how they worked. I loved the ideas put forth about fashion and how it has changed because clothing no longer had to be sewn by hand with the introduction of the mechanical sewing machine. Of course, more was said about Isaac Singer since he captured the market, but Wheeler & Wilson, White, National 2-Spool, Free Westinghouse (just like mine!), Davis, Elna, Necchi, Pfaff, and Kenmore were all described as we viewed these works of art. There was education, to be sure, but the presenters were clearly lovers of these old machines.

So who were the presenters? Scott Kennedy, Danna L. Fore, Cathy Racine, Joseph Brennan, Karen Castor, Will McCann, Terry Crawford Palardy, and Renato Pace. Of these eight people, some names I recognized, others were new to me, who got into this hobby (for most of them) for a variety of reasons yet clearly love what they are doing even if it's now a business. After watching these experts talk about their machines, I really wanted to know who they were and how I can visit each one since we are such kindred spirits but I had to wait until the end when each one was identified and a bit of their history was revealed. Wow, was that ever neat! Cathy Racine's father was an auto mechanic so she had been exposed to mechanics early. She found that after teaching autistic children all day it was refreshing to be able to work on a sewing machine, to fix it, and find it stayed fixed, implying her students were  not going to get "fixed" or remember lessons from day to day. That resonated with me, too. A final comment by Will McCann was a fitting way to end the film when he said we should have a convention where those of like mind can gather to hear experts talk about and give lessons and we could just be together. Yes, that does sound like an event I would like to attend, too. How about you?

If you would also like to watch this film, I invite you to go to Still Stitching where you can watch the preview for free. If you would like to experience all of it and save some money enter the code sewmavin to rent the film for 30 days at 50% off or use the code to buy the DVD for 15% off. This offer is good until the end of January, something nice to do when it's too cold outside to be running around and we look for inside entertainment. John has extended this offer to me and I could have made you email me for the code but I really just want to make it as freely available as possible. Yet, if you do watch Still Stitching please consider making a comment in this blog post so we can all enjoy your opinion of the film. This is a great community of vintage sewing machine fans and we would like to hear from you, too.

Tuesday, April 14, 2015

Textile Center Garage Sale

Remember when you were a kid and it seemed like you waited all year for Christmas? The Textile Center garage sale is like that for me. Seriously! Although it has been an annual event for 15 years, this is only my third year in attendance but I'm already a huge fan. This year I decided to support them by volunteering in their set-up so I'll start with an explanation of how this starts.

The Textile Center is a center for learning about textile arts and is a non-profit organization of artists. In order to fund many of their projects, such as a summer camp for kids and various programs, this fund raiser was born. It is held in a storage facility/warehouse for reusable good from the U of MN so while we are setting up and selling the textile materials, the warehouse is selling used file cabinets and chairs. Desks and tables are arranged down the aisles, taking up two of the three largest areas. Donations for the sale are brought around to a side door and runners unload the vehicles while others are sorting, bagging, and pricing items not already pre-priced by the donors. I volunteered at the sign-in desk and directed the foot traffic a bit for three hours. It was fun to watch and I could shop when my shift was over but I only bought three books, resisting temptation until Saturday. There is a preview sale on Friday evening but it's a fund-raiser too, with admission at $25-30. I knew I could wait until Saturday.

Saturday dawned with mild temperatures, always iffy on an April day in Minnesota, and I met my daughter Kelly and friend Ann at a nearby parking lot and we drove together because the parking lot charges $4 per car and the off-street parking is very limited. This was a first for Ann and we just couldn't prepare her enough for the size and variety of items. There are patterns, magazines, books, yarn, wool roving, fabric of all types, and then all of the paraphernalia that goes with these crafts. A silent auction is held for the larger items: looms, knitting machines, and sewing machines. Lots of sewing machines. It was fun to look them over and I put bids on the two I was hoping to take home. No, I was outbid but it didn't break my heart. Magazines and patterns are ten for $1 and most of the books were only $1, There was a section of UFO's: unfinished objects. I don't know if I should feel glad that the owners have finally realized they were never going to finish that blouse or knit a sweater on size 2 needles, or should I be sad that they have given up. There were bags of wool roving, cones and  skeins of yarn, and then before us were the tables/desks full of all kinds of fabrics. They ranged from cotton, knits, wool, satin, linings, Lycra, decorator and upholstery. When I was volunteering a woman walked in looking for directions to the unloading dock and said she had thirty boxes; there were many people who must have done the same to amass that many textile goods. So we shopped, putting items we dare not let lay on the table a moment longer:

When those items were safely in the car, we went back, met with other friends, walked around again, and finally got in line for the BAG SALE. Doors would close at 2:45 with everyone out and when they opened again at 3 pm you could put anything in the bag for $2 per bag, larger items going for half of their marked price. We were in line at 2 pm with only about a dozen people ahead of us so our hopes were high. A bright sunny day and friends kept us from boredom but it was still a long wait. They came out and checked our hand-stamps (admission was $1) and the doors were opened. Yes, once I got around the slow movers I ran to the back of the fabric and went right to the woolens and put my choice pieces in a bag, rushing over to the cottons, then the knits, back to the woolens and decorator fabrics, staving off panic (what was next?) over to the yarn to find there was only a little bit left, but the aisles were really filling up as now everyone was inside. All the while, one of the workers is standing on a desk top and yelling encouragement with phrases like "Remember, Mother's Day is coming"and "There's always room for one more bag!" I left the fabric and yarn aisle and went over to the books to pick up a few more, skip the patterns and magazines, and on to the UFO's. You see, I'm always rooting for the underdog and those projects represented someone's unfulfilled dreams. I found a children's sweater only half done, but then I came upon the read find: vintage linens! I found some tablecloths so I stuffed all of this into my bags and admitted I could carry no more. I went up to the checkout and paid for my four bags. I found my traveling companions and we did our own show and tell, proud of our bargains. What was the time? 3:20. It only took fifteen minutes to choose and cram all that stuff into four bags and pay for it. Wow, that was very fast. So here's my stash for the day:
Classic sewing books and magazines on sewing and beading

Woven cottons

Wools on left, knits and heavy woven on right

Patterns: maybe for mother-in-law?
The children's sweater was ripped out (too many mistakes!), washable fabric had the cut edges serged before washing, and everything was examined for possible problems and alerts. I found one of the patterns was a size 16 so that gets donated back, but everything else looks quite good. The vintage linen washed up great and those tablecloths were not all for the table: one zippered bag held a sheet and three pillowcases with beautiful heavy white on white embroidery. They were probably in someone's cedar chest where they were kept for "good" but that day never arrived. Most of us do not want to iron sheets these days so now they end up in a bag sale where I probably only paid 50 cents for them. I hope I can find an extra special good use that will represent the hours of work that went into their work and learn a lesson that we are not to save these items for "good" but to use them and celebrate the good in every day. It was a good day.

Sunday, April 12, 2015

So Many Books, So Little Time

The title of this post is a sentiment I had on a t-shirt from a friend years ago (where is that shirt now?) and it continues to resonate as I grow older. The list gets longer, not shorter with each book I read so how does that happen? While we were in Portland one of the landmarks is Powell's Books, a huge independent bookstore that has remained in business when others have closed their doors. While we can blame that on Amazon, this mega-book dealer has also enabled small dealers to thrive so I don't want to vilify Amazon either. Powell's downtown Portland store is called Powell's City of Books and it does seem to be its own small city, taking up the whole city block with multiple levels that you need a map to navigate. I went right up to the sewing section and found something you don't find at other bookstores: old and new books. They buy used books and include them for your browsing and buying pleasure. It was exciting to see some of the vintage books I've written about in an earlier post as well as those I've only heard about. I restrained myself and only bought two books and made note of a third title I coveted. My husband bought some very good gardening books (as well as a cribbage board so I could finally learn).

On the flight home I read cover to cover The Encyclopedia of Sewing Machine Techniques:
The Serger's Technique Bible by Julia Hincks and  Encyclopedia of Sewing Machine Techniques by Nancy Bednar & JoAnn Pugh-Gannon    
It was a wonderful book from applique to tucks on how to use your sewing machine and special presser feet or needles or thread to create special effects. Lace insertion was not enough: it included how to make your own lace with your sewing machine! It's not often you want to read an encyclopedia, but it was a great ride home with Bednar & Pugh-Gannon's book.

Since I now have five sergers, The Serger's Technique Bible explained the types of stitches and showed how they should look and what they are best used for. As with so many things, I just dove into sergers without much practical experience and this book helped me see what had only been written about in some of my serger manuals. What are all those special feet for and what is a cover stitch? Now I know for sure (but I'm not sure if I have a serger that can do a cover stitch!)

There was one book I ordered from Amazon that I looked at while at Powells but determined it wasn't worth the $25 cost. That's right, I got it for only a dollar plus $4 shipping. You can call me cheap, that's okay, but I had already supported the independent bookstore enough for one trip.
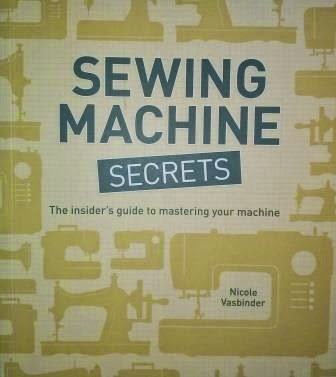
SM Secrets by Nicole Vasbinder
I don't think these are actual secrets but more about how to use your machine to its fullest. There is discussion about pros and cons of vintage and new sewing machines that is fair, which features are essential (adjustable needle position) and those that are considered optional (needle up/needle down).

Although I have had similar books in the past, the quality of the printing, illustrations, and photos are excellent in these newer versions. For a sewer who has been at it for awhile, the Secrets book would be a nice read, and those new to serging could put the Serger's Bible into use, but the advanced sewer could really get lost in the Encyclopedia of SM Techniques. Have you read a novel that was so good you hated to see it come to an end? When you read one of the books reported on in this post it doesn't have to come to an end: now you can go practice on your sewing machine to see if you can master any of the new ideas that have intrigued you. And now I bid you adieu as I move from my computer to my sewing machine to try out "off the edge scallops."

Wednesday, January 7, 2015

Dollars and Cents

I love what I do. Buying, refurbishing, and (hopefully) selling vintage sewing machines has become a hobby that makes money. Sort of. Since we have passed the end of the year, I now need to pay taxes on what I've sold and that includes craft fair items and sewing machines. When I have my personal taxes done I come prepared with all of my expenses and sales as well as labor charges (sometimes I only perform labor, no sales) and that will tell the real tale. Do I make a profit? Not last year but I think this year I just might have. This takes us to the question of how much money do I make off of the machine I sell to you? Now we are getting personal!

Stories are told of finding highly sought after sewing machines for a mere pittance and the joy of bringing it back into working order. What a find! For example, a sewing machine was only $3 at a thrift store because it was half price day or I could use a seniors discount. I take it home and find I need to do some major cleaning, oiling, and adjusting, about 4 hours of work. Because it came with no accessories I have to either purchase a set of feet and bobbins or see if I can put together a set from my own supplies. These might come from a donor machine or if there were extras with another machine but they are worth at lease $5-7. New needles need to be a part of every sewing machine and those do have a cost even if I use 50% off coupons. Now my bargain sewing machine has run me about $15 plus 4 hours of time. This is a basic run-of-the-mill example but most are not so easy and need rewiring of the foot control/motor/light that can take anywhere from one to four hours with the cost of the wire and new plugs adding up. Does the wooden box need a recover job? What kind of shape is the cabinet in? Can it be restored or does it need a full strip-down and refinishing? It's not just the time either but all of this takes supplies that get used up and need to be bought again and again.

I have a set of shelves of sewing machines that are all ready for someone to take home and begin sewing. I take one off the shelf and get it ready for a photo session, which used to mean putting it on a table and taking up to 10 photos with my phone's camera. If I plan it right, I can now use my husbands new camera and set up the tripod, staging area with backdrops, lights on poles, and photograph more than one sewing machine while I have it all set up. Photos have to be downloaded to my computer, cropped, and edited in many ways. Now comes the fun part: setting up an ad for my local Craigslist. Each ad needs proper wording to put the best features forward and to be as descriptive as possible. Here's one ad:

Vintage White brand sewing machine in a cool zebra striped portable case. This sleek sewing machine makes great stitches, looks in near perfect shape, has all metal inside and out for long wear. The custom covering on the portable case gives this machine a new and clean feel. Includes a box of accessories and foot control. Has been cleaned, oiled, and tested so you will not have to take it in for service but just get ready to sew. Give this sewing machine a test drive to see what you are missing!  


This White sewing machine is an animal!

Each photo shoot and ad takes at least an hour of my time and skill. If you have been adding this up you will see that even a bargain sewing machine in good shape takes a considerable amount of time and sometimes money to bring it to the buying public.

How about pricing: how do I decided what to charge? This is usually based on the market, looking at other similar sewing machines and seeing what they are listing for and using Ebay sold items price. That $3 sewing machines is selling for $50 on Ebay and I have invested $20 and 8 hours of time. Can I price it for $150? Sure, but it will sit on my shelf. So I price it to sell and put a price tag of only $40 on it thinking it would be a nice addition to a collector, beginning sewer, or to fill a special aspect of someone's herd of sewing machines. You can see that I'm not making much money on this but I get to work and play with each machine and have the privilege to place it in someone's hands, hopefully, to make it productive again or open up a world of sewing to a beginner. That might sound hokey to some but I really do like to match up each person looking for a sewing machine to the right machine. The look of delight in their eyes when they walk out the door with their treasure is pretty wonderful.

Now for the hard part. Negotiation. Most people are not taking into account all of the above and just want a sewing machine for a bargain: that's why they are using Craigslist, right? But when that $40 sewing machine, that now works great, is posted I really do think it's a bargain price. But I frequently get asked if I can go lower, like to $25. Of course I can, but I'm reluctant to let this now nice sewing machine walk out my door with only $10 going into my kitty. All that work for $10? With my asking price I'm only making $25 and that's for about a days work on it. If you want a bargain you can get that sewing machine at a thrift store like I did and take it home with you, spending your spare time getting it into shape. Don't have the skill or time? That's what you are paying me for, my skill and time. It's nice when you honor my request for a price as fair because you are not getting cheated and I'm not getting rich with my hobby/business. Trust me.

Saturday, August 16, 2014

Graphic Novel


This is such a cool graphic I wanted to try out because it shows how a stitch is made with a standard home sewing machine:

From Sewing Machine Steve's website
Isn't that just cool? It clearly show how the needle goes down and has to hit the gray "hook" that catches the thread to lock the upper thread with the lower bobbin thread together. Of course, the feed dogs are moving everything right along so it can be repeated over and over again. Sometimes when we know how something works we can figure out why it doesn't.

Let me tell you about Sewing Machine Steve's website, where I found the above animation. He restores vintage sewing machines and has all kinds of information about his process but the part that really blew me away was his explanation about why you should buy a vintage over a new sewing machine. Entry level sewing machines are going to start at $250. Those are bottom of the line and a good one is closer to $1000 for entry level. You can buy a refurbished vintage sewing machine for $100-250 and get a really good one that won't have to go back to the dealer. Ever. Keep it oiled and clean and it will keep running as there really is very little that goes wrong. If so, you can learn to repair them as I have. But Steve goes on to say that right away you are ahead by $1000 and will never need to trade up since you are already at the top of the line. I couldn't agree more. Thanks, Steve for making it all a bit clearer for me (and now you).

A bit of a set-back with the decals on the Singer 66. You do have to gently sand away the edges with 1000 grit wet/dry multi-surface sandpaper and it can be done. BUT it takes a long time to accomplish this. After thirty minutes tonight I had to go do something else! It's really tedious. Really. Tedious. I will have to keep at it if I ever want to see it finished. This procedure dulls the surface and I will have to clear coat again. And probably again. All of this is to remind anyone else that you do this out of a labor of love because you will never get out of it what you put into it. Glad this was my first project. These episodes on my blog are become more like a graphic novel. Here's a photo of the sewing machine with the sanding done:

Sanding the edges of the decals
Stay tuned as SMMavin gives it the ol' college try with one more layer of clear coat!

Wednesday, July 31, 2013

It all started with a Viking

It all started with a desire to upgrade my 30 year old Kenmore sewing machine. After a couple weeks of searching on Craigslist and researching my finds, I came up with this:
She's a beautiful Viking Husqvarna Freesia 415, about ten years old, and a good buy at $250 and a 30 minute drive north (okay, more like 45 minutes but that's my own lack of directional sense and checking my printed map before I leave the house). The owner said her husband bought it because their daughter had this model in high school and they hoped she would take an interest in sewing, a familiar lament of my generation. After ten years and only a few minor repairs, she was tired of feeling guilty about not using it (her daughter bought some cheap sewing machine and was happy with it) and an upcoming move compelled her to sell it and just move on.

I brought fabric to try it out, including denim, and it was a dream. I loved the clean lines, features I never even knew about, such at the fix button and up/down needle positioner, and I was a gonner. She still had the original box, VHS tape for instructions, manual, all assessories: what was not to like?

On the way home I had to stop and call my sewing daughter to tell her of my great find and she was supportive. Did I mention it was all on Mother's Day? What a way to celebrate.

I put her through her paces, trying out various stitches and effects, all smooth and easy. Storage is in the back tray that even lifts out to store less used items. So convenient! After watching the video I learned of a few additional things I had not read (or did not appear) in the manual. Speaking of the manual, it is for Freesia 415 and 425 so you keep seeing what you did not get if you have the lesser model. Of course, I wanted more bells and whistles but comforted myself with the idea that I finally had a VIKING sewing machine.

Life was sweet.